

How To Add Lights In Photoshop
Become fix to relight your photos in Photoshop. I'chiliad amazed at how many people tell me they have never heard of the really powerful LIGHTING EFFECTS filter.
In this Photoshop Tutorial nosotros are going to use the Lighting effects filter to simulate real lighting. This filter has a lot of powerful features. I'll show you how to utilize them in this tutorial. We are going to d 2 projects. The showtime is adding colored gels in Photoshop and the second is relighting a scene and adding texture. This is also part ane of a 3 parter on the Lighting effects filter, look for the other ii parts here on PhotoshopCAFE. Please picket the video for more detailed explanations and extra tips. This written component will serve as a groovy reference for you.
This is office ane of a series. Office 2 is here.
Lighting effects isn't working?
I have received a lot of messages about different things not working, here are the common solutions.
- Make sure you are in RGB mode and 8bit color. (under Prototype>Way)
- If you don't see the controls, press Cmd/Ctrl+H
- If its not working endeavour going to Preference>Performance and make certain Use Graphics Processor is turned on.
- Sometimes you lot have to quite Photoshop and go back in when changing texture channels, as it has a few footling bugs.
Making Colored Gels in Photoshop
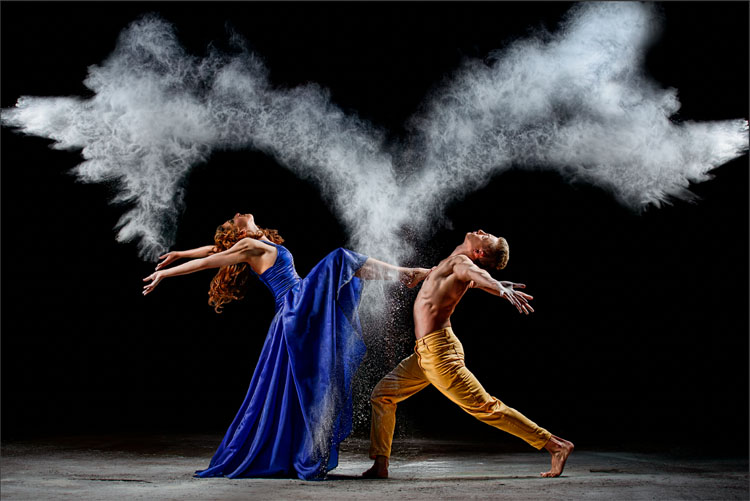
Here is a photograph I grabbed from Adobe Stock. Lets starting time with a double gelled spotlight issue
Step one.
Cull Filter>Render>Lighting effects
(annotation, yous need to be in RGB style and 8 scrap for this to work, you can detect this under Image>Mode)
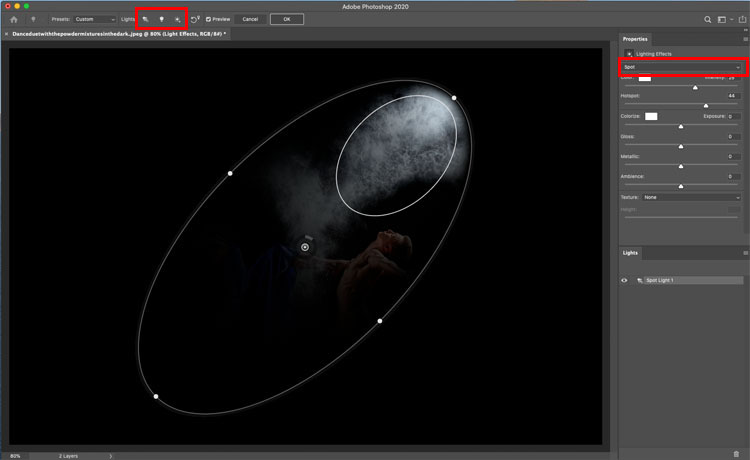
In that location are 3 types of lights available
This is spot which is a spotlight / floodlight
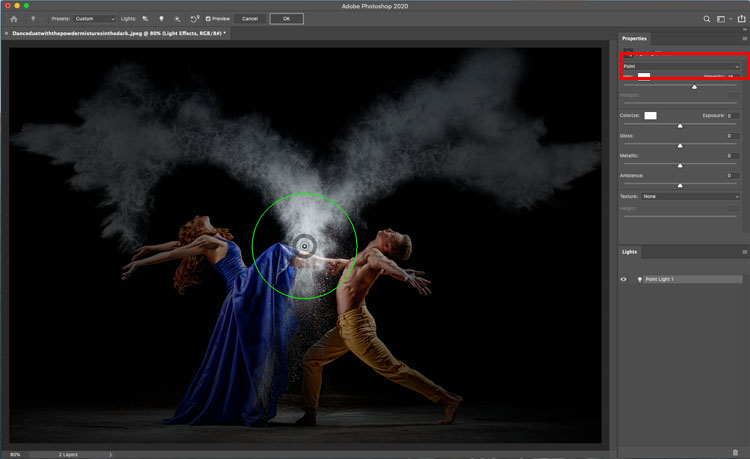
Second calorie-free is a signal light. This is a like a lightbulb in infinite.
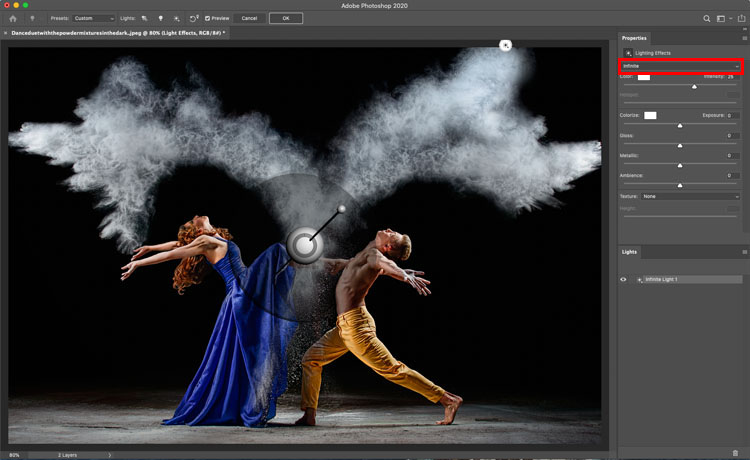
Third is an space. This is a directional low-cal, like the sun.
Pace 2
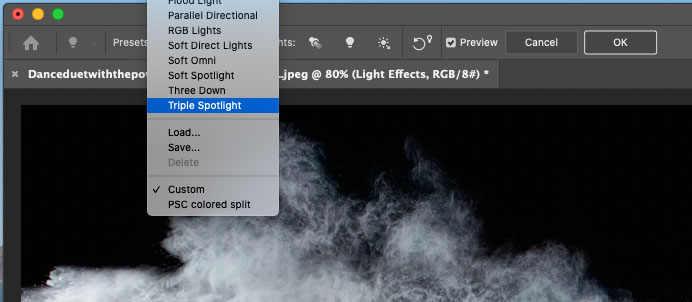
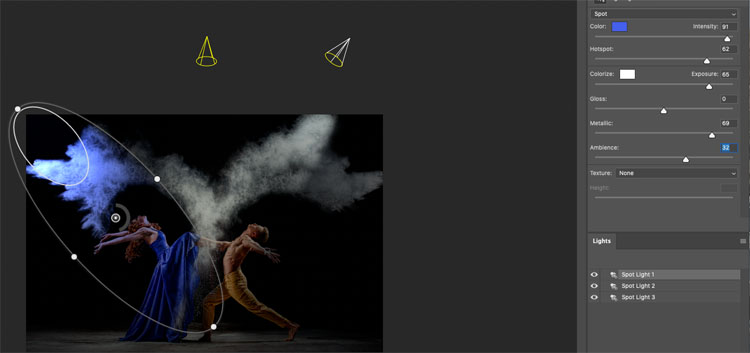
Under the presets at the top, choose a Triple Spotlight. These presets are quick ways to become started and some of them are quite cool looking.
Yous'll see this
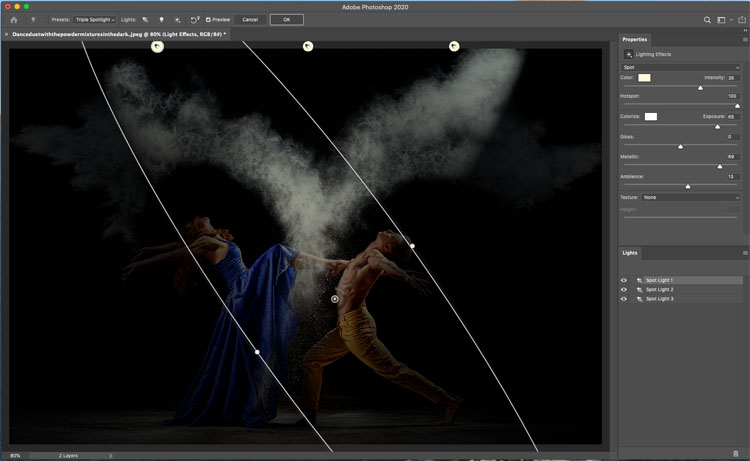
Step three
Zoom out but using the zoom settings in the bottom corner, or Alt+scroll cycle on your mouse.
You can drag on the points to change the size brightness and angle of the low-cal.
Adjust the hotspot for a softer falloff.
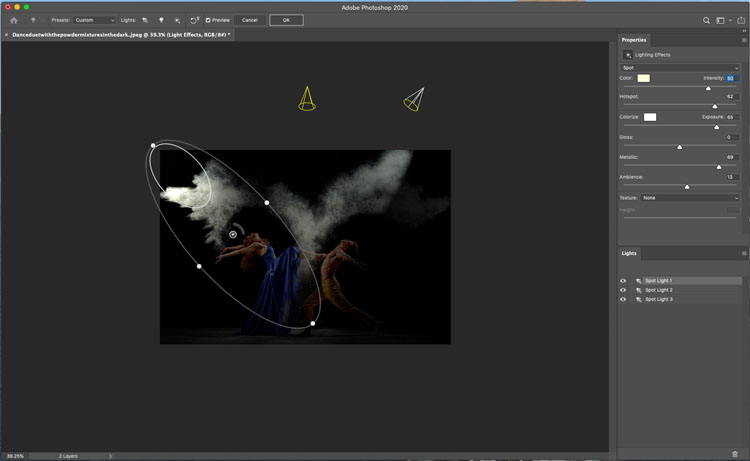
Step 4
Click on color to add some colour to the low-cal.
Drag inside the square swatch to choose the color. Information technology works but the the colour picker in Photoshop.
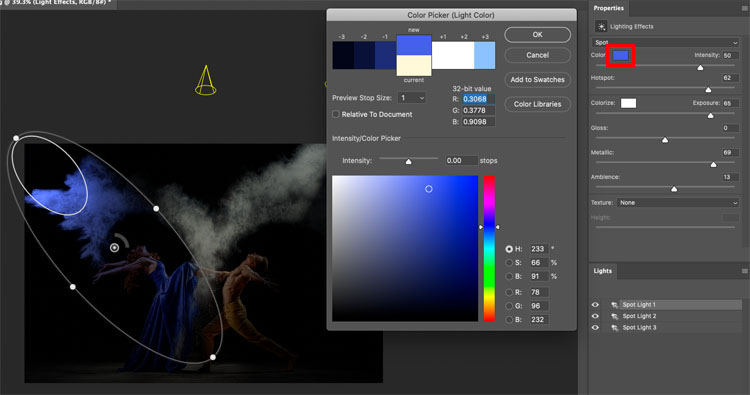
Step v
Adjust the intensity to choose the effulgence of the light
Step half dozen
You tin burnish the residuum of the photo with the ambience slider. This adjusts the overall effulgence of the entire paradigm.
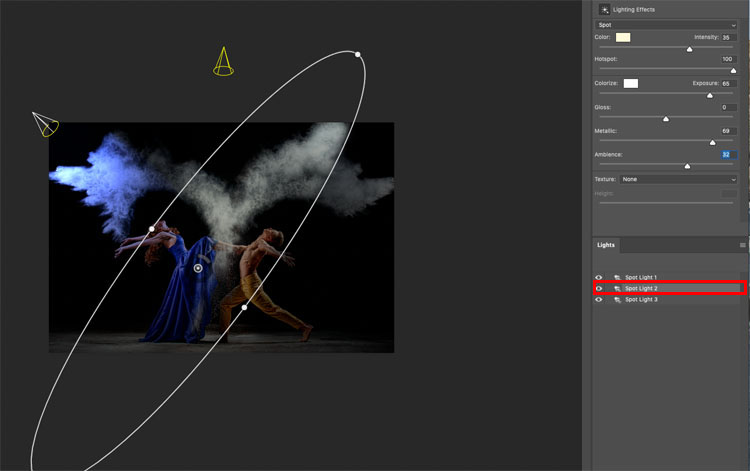
Stride 7
Choose a different lite to adjust. Y'all tin select past clicking the low-cal in the Lights panel.
Step 8
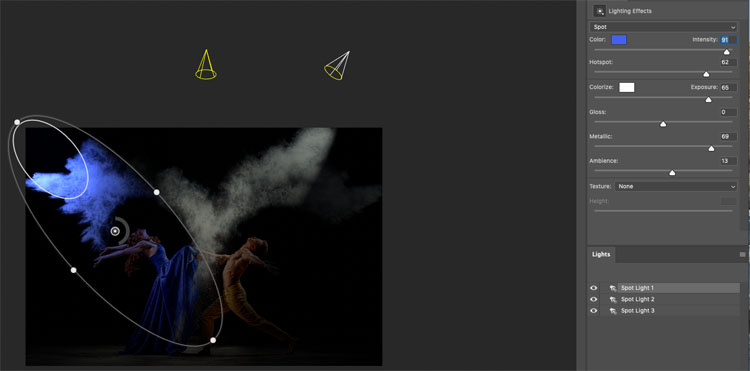
Let's choose a complimentary color. A nice orange this time.
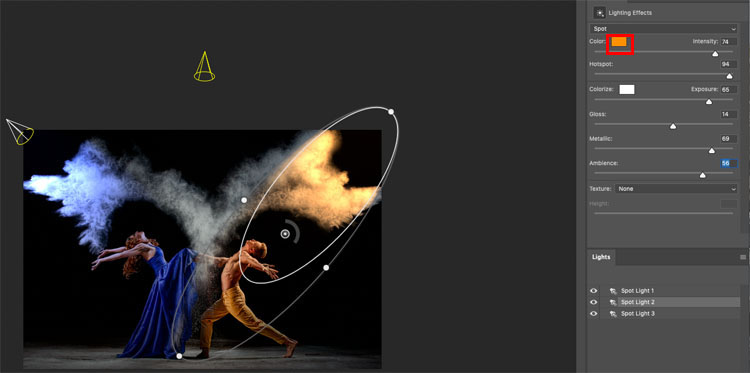
Step nine
For the 3rd light, y'all tin hide it by clicking the eye icon adjacent to information technology in the lights panel, or select it and press the trash icon to remove it.
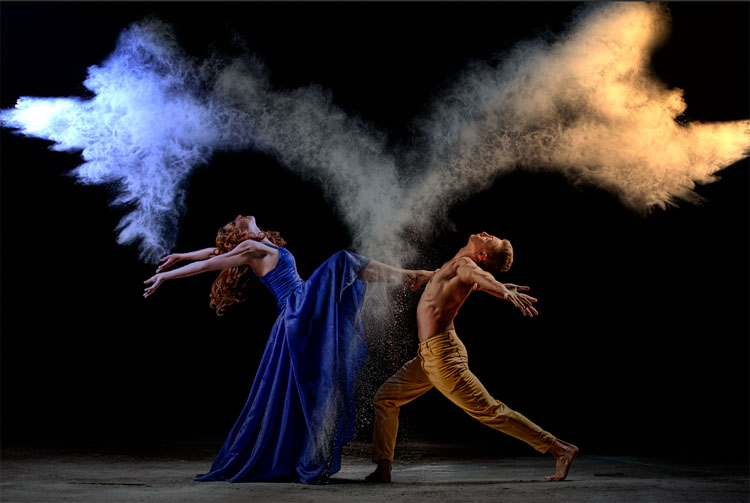
In this case, permit's go on it but lower the intensity so nosotros can nevertheless see some of the chalk in the middle of the epitome. (the smoke upshot is fabricated past throwing chalk).
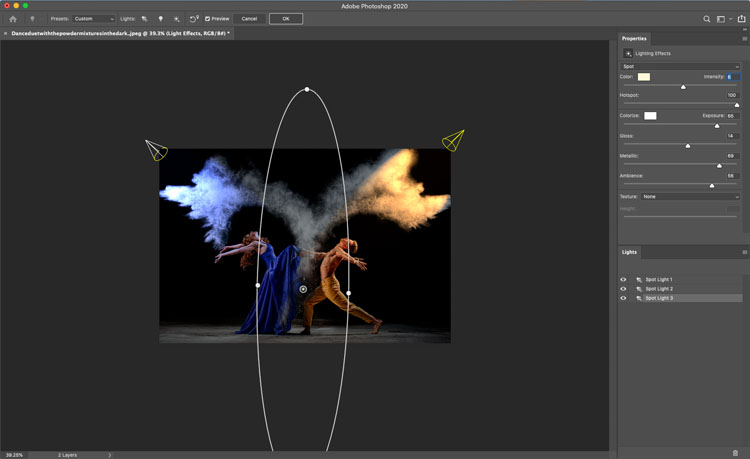
And the event looks like nosotros lit the sides with colored lights, or colored gels on spotlights. Let'due south continue..
Lighting a photo with a spotlight and realistic texture in Photoshop
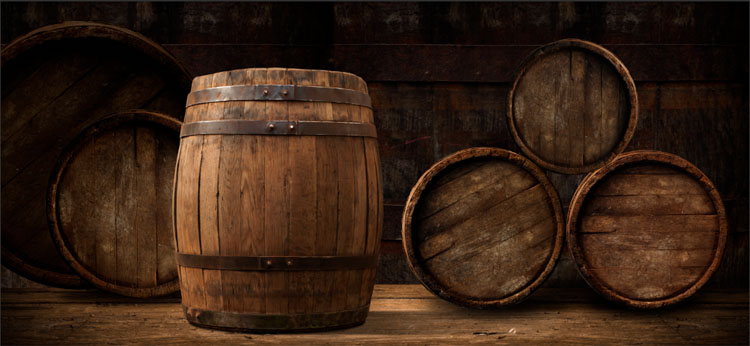
Let'southward step information technology up a chip more than with another photo from Adobe Stock. We will add together a dramatic spotlight.
Footstep ane
Cull Filter>render>Lighting effects
This fourth dimension cull Soft spotlight from the presets.
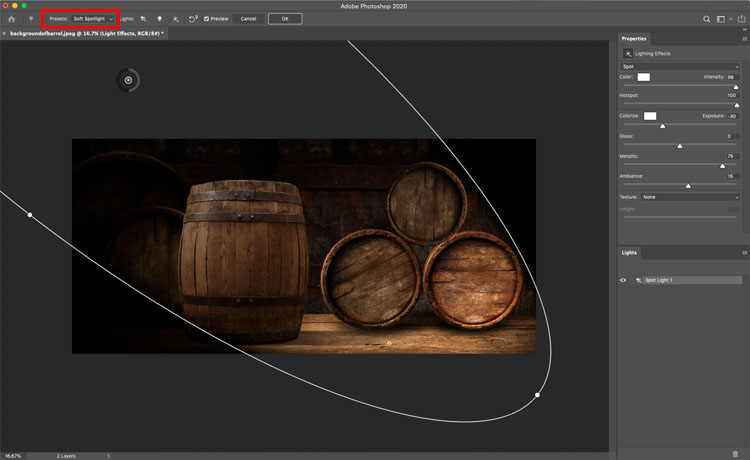
Step 2
Resize the position the lite and then ship the beam down from the left side.
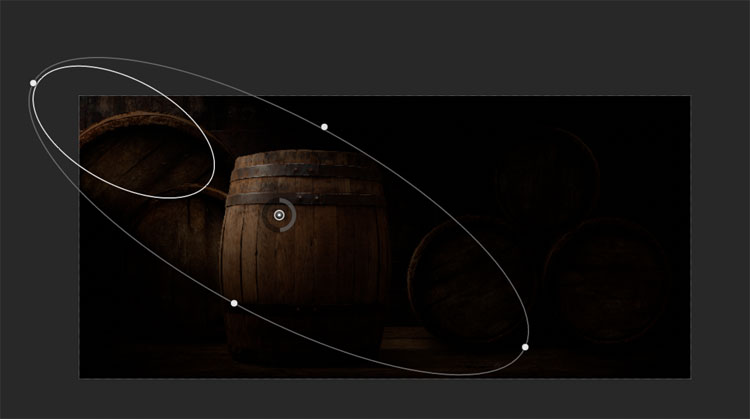
Here are the settings Im using
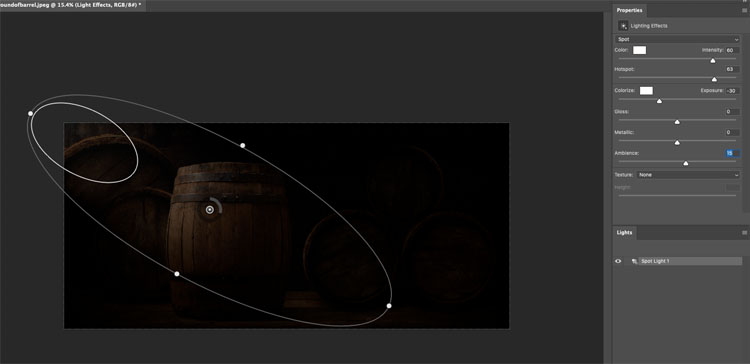
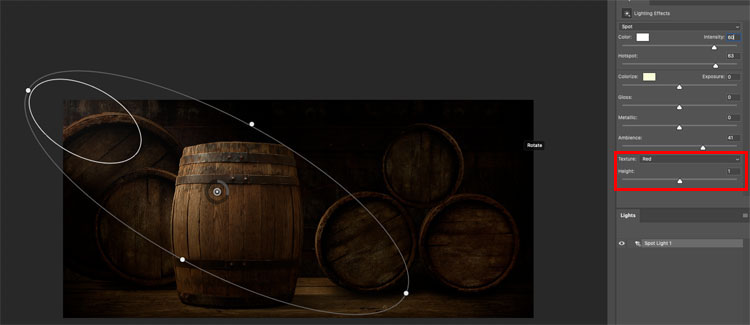
Pace 3
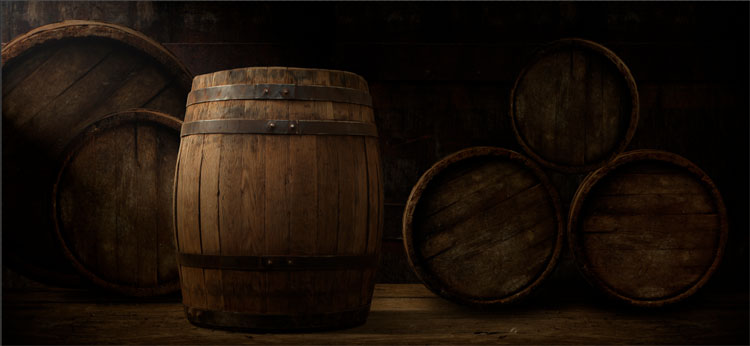
Increase the ambient until you can but see the background, but its notwithstanding dark enough that the spotlight has a strong outcome.
(This is a great fob to simplify a busy epitome and provide a overnice area to add text for designers.)
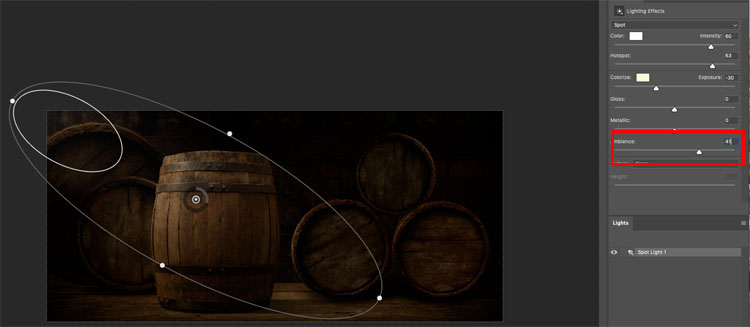
Step 4
At present for some magic.
Under texture, cull red. We are now loading the ruddy channel into the lighting effects (We will do WAY more with textures in upcoming tutorials on this, very soon).
Prepare information technology to the lowest value of one.
Look at how information technology popped the texture on the barrel. This is more than realistic because when you side low-cal something (called raking light) information technology casts tiny shadows and pops texture.
And the upshot.
Delight come back shortly I am calculation ii more parts:
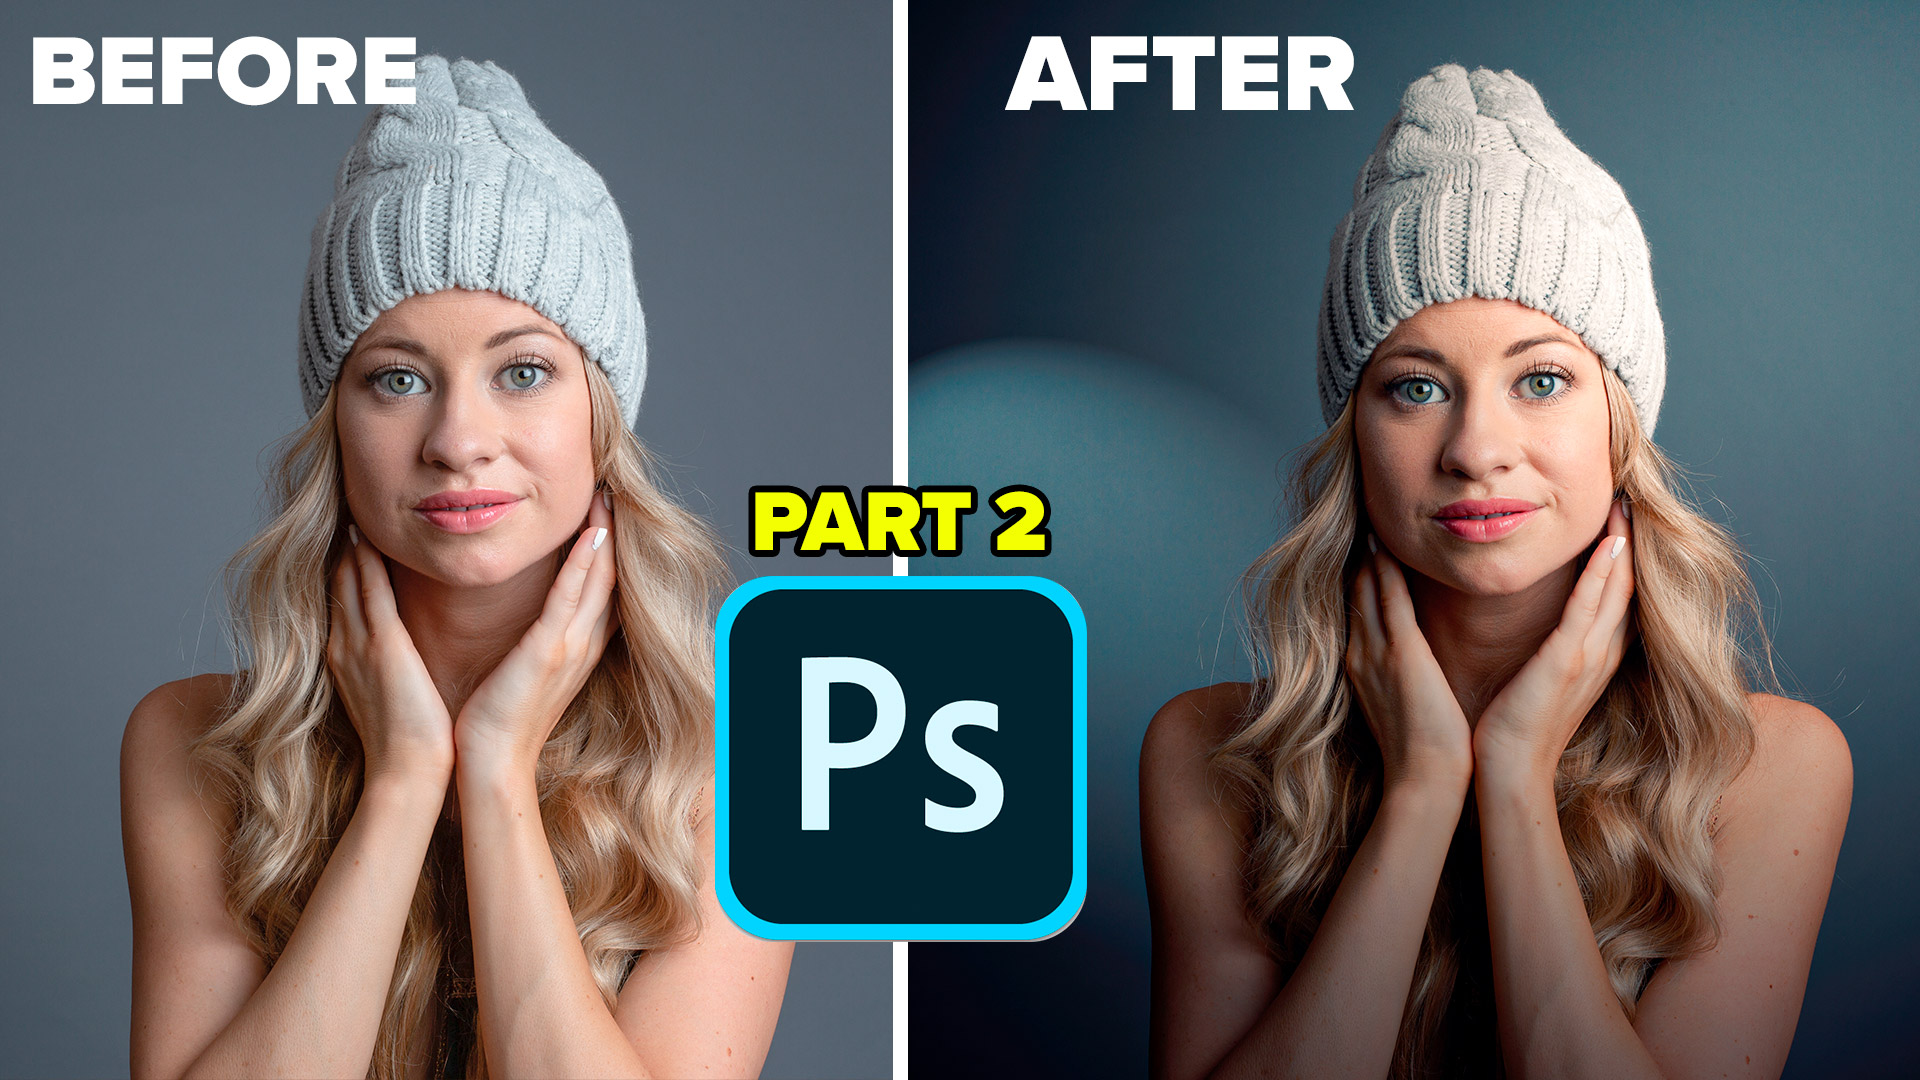
Lighting a portrait is here
as well as how to practice crazy realistic and 3D looking textures with this filter.
I hope you lot enjoyed this tutorial. Delight tell all your friends about PhotoshopCAFE.
Browse our hundreds of other free tutorials here, or search for what yous are looking for in the search at the pinnacle of the page.
Yous tin can also scan by topics in the complimentary tutorials menu.
If y'all are ready to get serious virtually Photoshop, see our full length courses here
PS Don't forget to bring together our mailing list and follow me on Social Media>
- Youtube.
(Ive been posting some fun Instagram and Facebook Stories lately)
Great to see you here at the Cafe,
Colin
You tin can get my free Layer Blending modes ebook here
If you like these techniques and you lot would like to dive deeper into Photoshop, I take merely launched an in-depth Photoshop Course. Its called Photoshop Secrets: Photoshop 2020 for Digital Photographers, Cheque it out here
Source: https://photoshopcafe.com/light-photo-photoshop-lighting-effects/
Posted by: bloomarou1944.blogspot.com
0 Response to "How To Add Lights In Photoshop"
Post a Comment